
Replace a rear panel
Replacing OEM structures in rear panel
Americas
Asia-Pacific
Europe
South Asia, Middle East & Africa
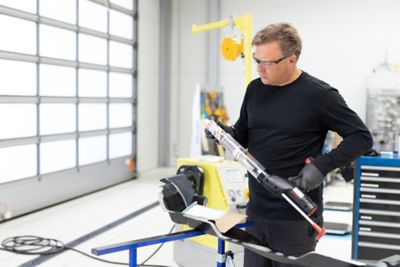
Panel bonding applications in the automotive industry have increased significantly during recent years. Learn everything you need to know about rear panel repair with TEROSON® EP 5055.
In our instructions, we show replacing a rear panel with TEROSON® EP 5055 panel bonder. Make sure to always follow the manufacturer's instructions.
All repair and maintenance tasks shown should be done by professionals only. Please do not try this at home if you are not qualified or professionally educated. Always follow car manufacturer's instructions.
Limitation of liability
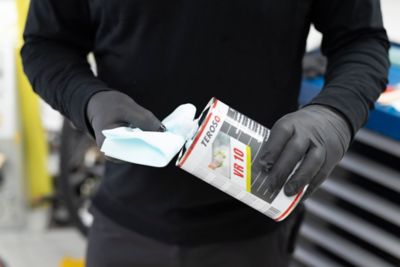
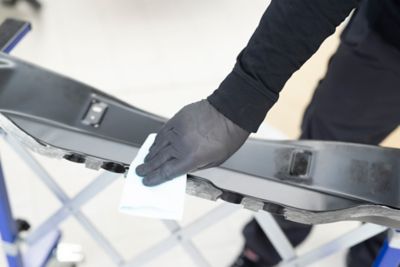
Bonding surfaces must be free of oil, grease, dust, or any other contaminant. Clean bonding surfaces with TEROSON® VR 10 and a lint-free cloth.
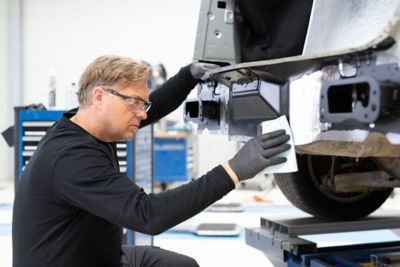
Remove old adhesive from existing body parts to make sure they are back to bare metal and free of any contamination.
Both bonding surfaces must be cleaned again to remove grinding dust. Pretreat bonding surfaces with TEROSON® VR 10. Allow the prepared surfaces to dry for approx. 5 minutes.

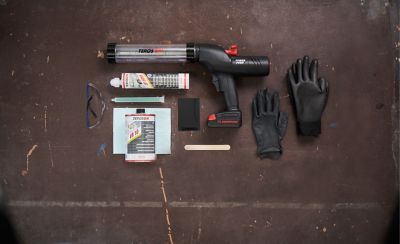
Unscrew the coupling ring and remove the cap from TEROSON® EP 5055 cartridge. Before attaching the static mixer to the cartridge, squeeze out a small amount of material until both adhesive components run equally. This is necessary to achieve a good mix of the two components.
Attach the static mixer and fix it with the coupling ring. Insert the cartridge into the application dispenser.
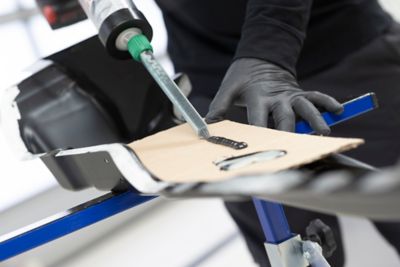
When mixed, TEROSON® EP 5055 is very dark grey in colour (almost black). Discard first 5 cm of adhesive.
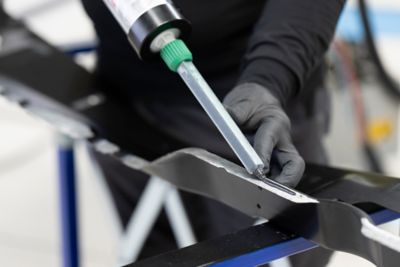
Apply and spread TEROSON® EP 5055 with a spreader or brush. All bare metal areas should be covered with adhesive for corrosion protection. TEROSON® EP 5055 can be used on steel and aluminium panels and as part of the preparation. With new panels, the ‘e coat’ must be removed from the bonded area and adhesive applied and spread to cover the bare metal.
Open time for mixed adhesive (at normal room temperature of 23°C) is approximately 60 minutes. It may be necessary to change the static mixer if no material has been passed through it in over 30 minutes.
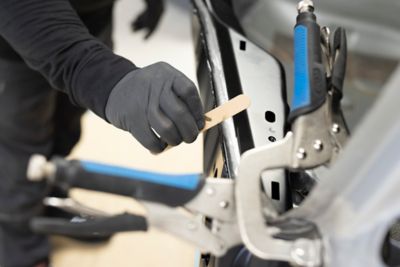
Remove excess adhesive immediately with spatula or cloth and TEROSON® VR 10. Cured adhesive can only be removed mechanically.
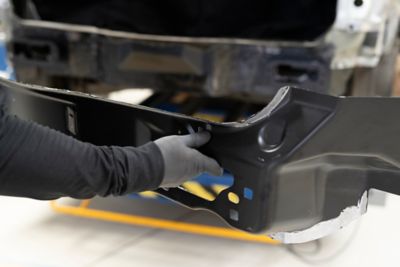
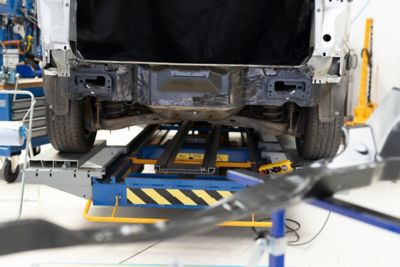
Join and fix components within the 60 minutes processing time. If spot welding is required, it must be carried out during this initial period. Do not subject bonded parts to stress before final cure.
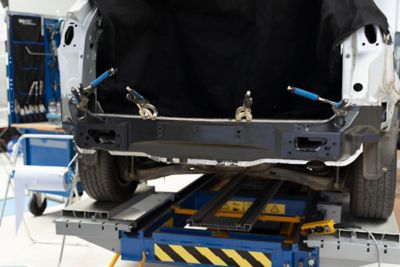
The adhesive cures at room temperature. (Initial strength approx. 4 hours at 23°C; final strength approx. 48 hours at 23°C.) Curing time can be accelerated using common tools like infrared or heating pads. (Final minutes at 65°C or 30 minutes at 100°C.) During the curing phase, avoid movement or stress until the product is fully cured.
When initial bond strength has been reached, bonded parts can be painted.
ANSWERS TO YOUR MOST COMMON QUESTIONS
Limitation of Liability
The information provided herein, especially recommendations for the usage and the application of our products, is based upon our knowledge and experience. Due to different materials used as well as to varying working conditions beyond our control we strictly recommend to carry out intensive trials to test the suitability of our products with regard to the required processes and applications. We do not accept any liability with regard to the above information or with regard to any written or verbal recommendation, except if otherwise explicitly agreed and except in relation to death or personal injury caused by Henkel´s gross negligence or intention and any liability under any applicable mandatory product liability law. Please note that the information provided by us may not be current, complete and correct. It is not intended to serve as legal advice. Each user is solely responsible for assessing and ensuring compliance with any applicable law. The information is protected by copyright. In particular, any reproductions, adaptations, translations, storage and processing in other media, including storage or processing by electronic means, enjoy copyright protection. Any exploitation in whole or in part thereof shall require the prior written consent of Henkel Corporation. Except as otherwise noted, all marks used in this sell sheet are trademarks and/or registered trademarks of Henkel and/or its affiliates.

