
Repair a cracked bumper
Use it for any plastic damage, e.g. holes, scratches and cracks
Americas
Asia-Pacific
Europe
South Asia, Middle East & Africa
With the increasing use of plastics in automotive engineering, plastic repairs are becoming more important. For example, Instead of replacing the full bumper, plastic repair allows you to reduce material costs and recycle. For a more sustainable repair.
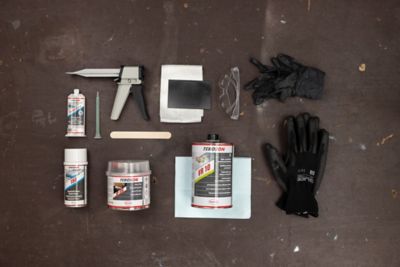
In our instruction, we will be showing a bumper repair using TEROSON PU 9225 SF ME (you can also use TEROSON PU 9225 SF). This is a product recommended for holes, scratches and cracks smaller than 7 cm. For applications bigger than 7 cm you may also use TEROSON PU 9225.
All repair and maintenance tasks shown should be done by professionals only. Please do not try this at home if you are not qualified or professionally educated. Always follow car manufacturer's instructions.
Limitation of liability
Remove all major dirt and rinse the plastic part with plenty of clear water. Clean and pre-treat the repair area using TEROSON VR 10 with lint-free cloth.
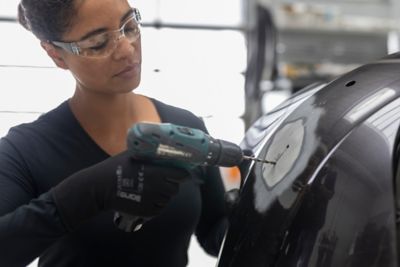
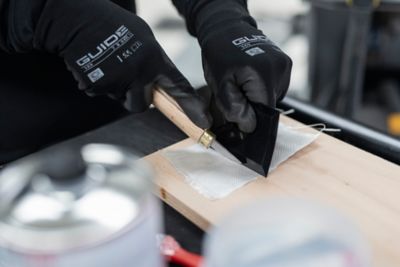
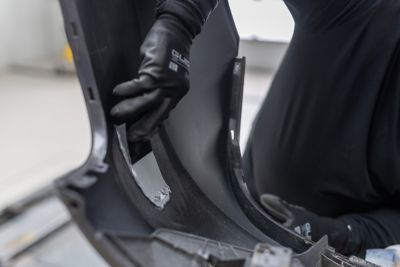
For cracks drill out the hole at the ends. The hole diameter should be about 6mm to stop further cracking. Enlarge the crack to the minimum 2-3mm gap. In case of a hole go to step 3 directly.

Grind a V-groove into the frontface edges of the repair area. The holes at each end should also be V-tapered with a grinder.
Roughen surfaces on both faces with P150 grinding paper. Remove the grinding dirt. Don’t forget to also sand the back of the damaged area. Clean and pre-treat both sides (front and back) with TEROSON VR 10.
Adjust the mesh to the desired size and cut a piece of fibre mesh larger than the damage. Make sure to cut-off the edges of the fibre mesh to prevent fraying.
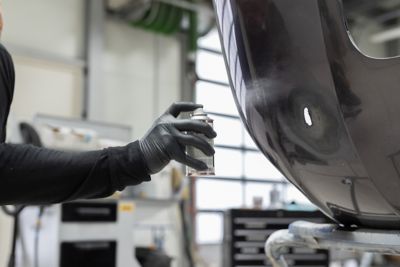
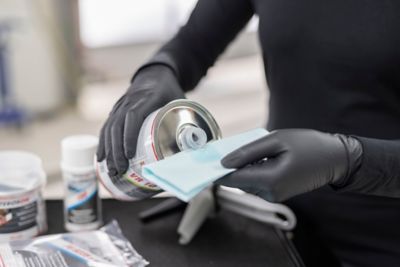
Spray a thin coat of TEROSON 150 primer onto both sides (front and back). Flash off time is 10min at room temperature.
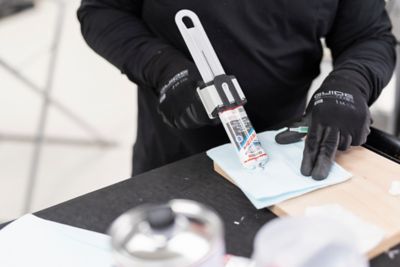
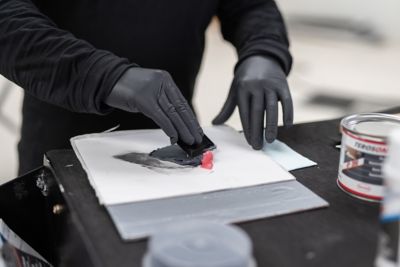
Open the cartridge and squeeze out a small amount of material until both adhesive components run equally. Apply the mixing nozzle and discard the first 5cm of the mixed adhesive.
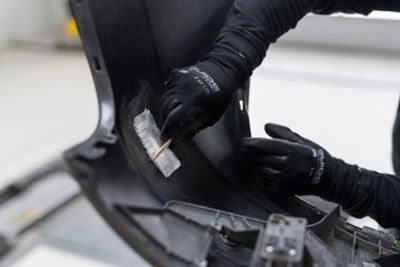
Apply TEROSON PU 9225 SF ME to the back of the repair area. Position the fibre mesh over the damaged area and press it down into the adhesive with a spreader until the fibre mesh is saturated.
Apply the adhesive on top of the fibre mesh and spread it to cover the repair area completely. Keep the nozzle inside the material to avoid air pockets.

No need to place the repair area under an infra-red lamp as the TEROSON PU 9225 SF ME cures to tack free after 10min at room temperature.
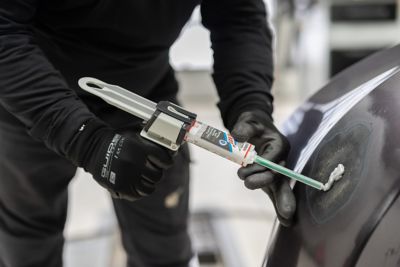
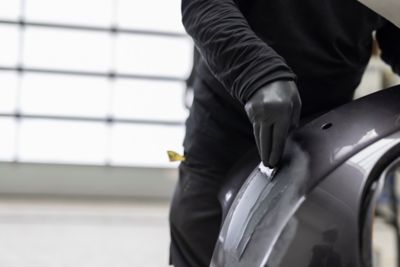
Apply TEROSON PU 9225 SF ME to the front side, keeping the nozzle inside the material to avoid air pockets. Smooth down with a spreader, always from the centre of the damage outwards.
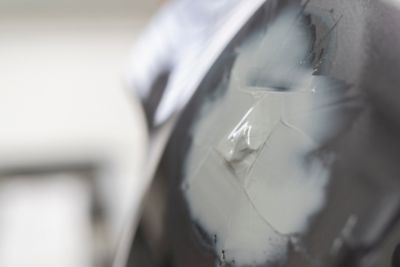
No need to place the repair area under an infra-red lamp as the TEROSON PU 9225 SF ME cures to tack free in 10min at room temperature.
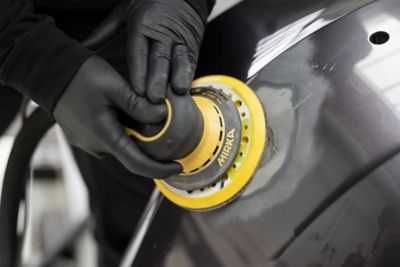
Grind the repair area to smooth the surface and clean with TEROSON VR 10 using a lint free cloth.

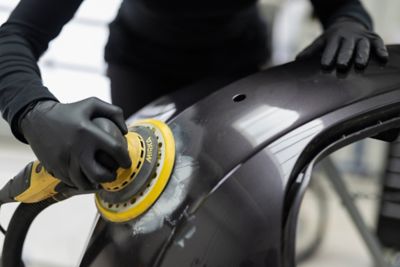
For optimal adhesion, apply a thin coat of TEROSON 150 primer. Allow 10 min flash-off time. During flash-off time, mix the plastic filler TEROSON UP 250 together with the hardener (ratio: UP 250 golf ball size, hardener pea-sized).
Apply the mixed body filler onto the prepared repair area and spread it evenly. The surface can be sanded (after approx. 30 Min.) to be ready for painting.
Painted bumpers are now ready for the paint process and should be processed in accordance with the paint suppliers recommendations and instructions.
ANSWERS TO YOUR MOST COMMON QUESTIONS
Limitation of Liability
The information provided herein, especially recommendations for the usage and the application of our products, is based upon our knowledge and experience. Due to different materials used as well as to varying working conditions beyond our control we strictly recommend to carry out intensive trials to test the suitability of our products with regard to the required processes and applications. We do not accept any liability with regard to the above information or with regard to any written or verbal recommendation, except if otherwise explicitly agreed and except in relation to death or personal injury caused by Henkel´s gross negligence or intention and any liability under any applicable mandatory product liability law. Please note that the information provided by us may not be current, complete and correct. It is not intended to serve as legal advice. Each user is solely responsible for assessing and ensuring compliance with any applicable law. The information is protected by copyright. In particular, any reproductions, adaptations, translations, storage and processing in other media, including storage or processing by electronic means, enjoy copyright protection. Any exploitation in whole or in part thereof shall require the prior written consent of Henkel AG & Co. KGaA. Except as otherwise noted, all marks used in this sell sheet are trademarks and/or registered trademarks of Henkel and/or its affiliates.


